Showing posts with label fabric. Show all posts

Thursday, September 23, 2010

Make Your Own Ombray Fabric


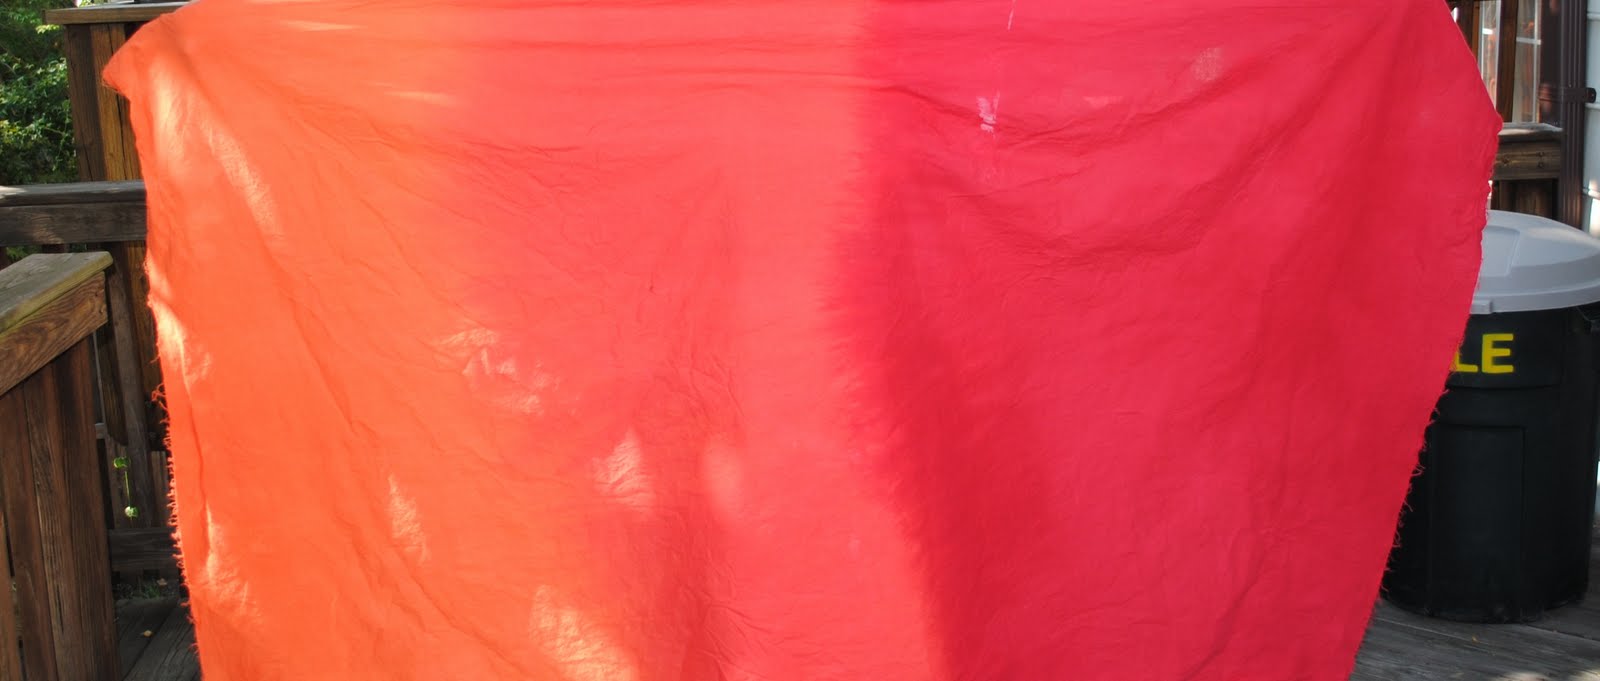
Ombray: dyeing technique where similar color tones are used to go from light to dark. (ref

For this project I will be using white cotton muslin, $1.49 a yard at Jo-Ann’s Fabric. Fabric needs to be white or your colors will not come out the same as the dye packet. I will be dyeing the fabric in three different dye baths. For this project I used Tangerine Rit dye and Fire Red iDye. Jo-Ann’s Fabrics carries Rit, Dylon, iDye, etc.  I saw no difference in performance of the different brands; each did well. So just choose which ever colors you like.

Follow the directions on the dye packet, using the bucket method, NOT the washer method.

STEP 1
  • Soak entire piece of fabric in the bath.
  • [TIP: Water amount and length of time will after the concentration of your color. If you want it lighter dilute the bath and leave the fabric in for less time. Vice versa if you want it darker.]
  • Rinse fabric till most of the dye is out. Don’t worry about trying to rinse it clear till the end of the third step.


STEP 2
  • Mix up Fire Red iDye. Take half of it and combine it with half of the Tangerine bath.
  • Take 2/3 of the fabric and soak it in the bath, letting 1/3 of the fabric hang out of the bucket.
  • Rinse.


STEP 3
  • Take 1/3 of the fabric and put it in the pure Fire Red bath, letting 2/3 of the fabric hang out of the bucket.
  • Rinse till water runs clear. May have to run it through the washer. If so add 1/3 vinegar and 1/3 salt to load, will set the color so it won’t run in future washings.


Tuesday, September 21, 2010

Fabric Frenzy Fray Texture

I went to an art festival in Washington DC a couple weeks ago. A lady there made these beautiful pillows using a fun texture. She shared how she did it, so now I am sharing it with you, with my own twist.

This is a great project to use up all those scraps you have taking up space. This is great technique for home décor projects (pillows, blankets). You will need 5 different types of fabrics.

Step 1

Cut your 5 pieces of fabric to the specification of your pillow or any other thing you may be using this technique for.


Step 2

Layer the 5 pieces of fabric, putting the fabric you prefer the most on top.

Step 3

After lining up all the edges pin the layers so that they will not shift while sewing.
Step 4

With chalk draw lines along the bias grain of the fabric. (Never use a pen, can stain fabric. Invest in sewing chalk or erasable fabric markers. Can be found at any Joann’s) Visit this site to understand bias grain.


Step 5

Sew along the chalk lines with a normal running stitch.


Step 6

Cut through four layers in between the sewn lines, down the middle. DO NOT cut through the bottom fifth layer. Fact: fabric won't or will minimally fray when cut along bias.


Step 7

OPTIONAL: Take a needle and thread, periodically tacking the fabric. Once put through the washer and dryer, take out those stitches. Fabric will stay in place. This will add more interest.


Step 8

Baste around all the edges of you fabric piece. (This will help prevent fraying where you don’t want it to)

Step 9


Put the fabric through a cycle in the washing machine and in the dryer. Continue to wash if you want it to be more frayed.


FINISHED!!!

Wednesday, September 8, 2010

Martha Stewart Silk Flowers

The Martha Stewart website is a great resource to find free and cute craft tips. I came across this tutorial and just luv it! Click on the link so you can follow the tutorial. Silk Flower